With fire posing deadly risks and devastating consequences, it is essential that fire safety is top of your agenda when considering health & safety signage for your business. Ensuring that you are prepared for the eventuality of a fire help can you avoid employee and visitor injury, protect against costly damages and recently increased health & safety breach fines.

Where do I start…?

If you’re responsible for the fire safety in your workplace, then the first step is to conduct a fire risk assessment of the premises. This will allow you to:

  • Identify risks and hazards
  • Control for identified risks by implementing appropriate fire safety measures
  • Make plans for an emergency
  • Inform staff of fire safety procedures
  • The Health and Safety (Signs and Signals) Regulations 1996 act states that safety signage should be used where there is a significant risk to health and safety where other methods cannot control the risk. Signs must conform to BS ISO 7010 standard to ensure consistency.Work environments come in all shapes and sizes so fire safety requirements will differ, however we have put together a recommendation of some of the essential fire safety signs you should be displaying around your business:

What are the 5 different categories of fire signage?

Fire Exit Signage

Fire Exit Sign

If your building has a simple layout and it is clear and obvious where the exit is e.g a door at the front of a small shop – then fire exit signage is not a requirement.

However for bigger or more complex buildings signage is essential. You should first determine your primary exit route.

This should be the shortest and quickest route out of a building from any given location – for these routes use the Exit signage.

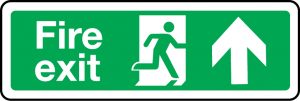
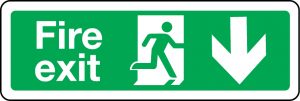
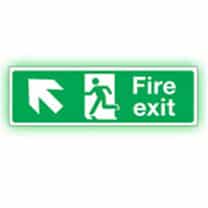
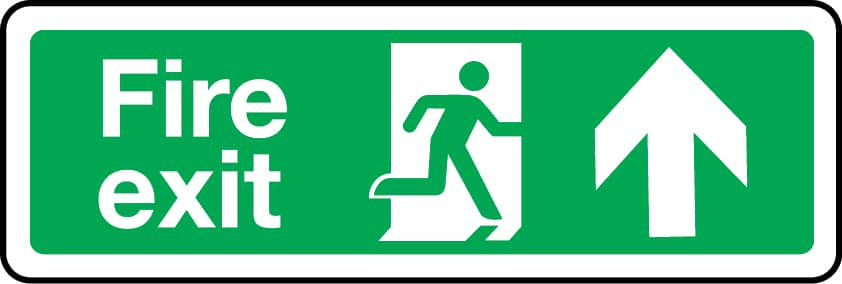
You also need to plan a secondary escape route in case a fire makes the primary route impassable. For this route and for all other routes out of a building use the Fire Exit Signage:

  • If in any doubt about which signs to use – use the Fire Exit Signage throughout the entire building
  • From any position within a building an escape sign should be visible
  • Once you have passed the first sign the next sign on the route should be clearly visible
  • You will need further signage at every change of direction
  • Final exit signs must be above all final exit doors
  • Signs must not be conflicting – e.g. two arrow up back to back sign could cause confusion or people from opposite directions running in to each other

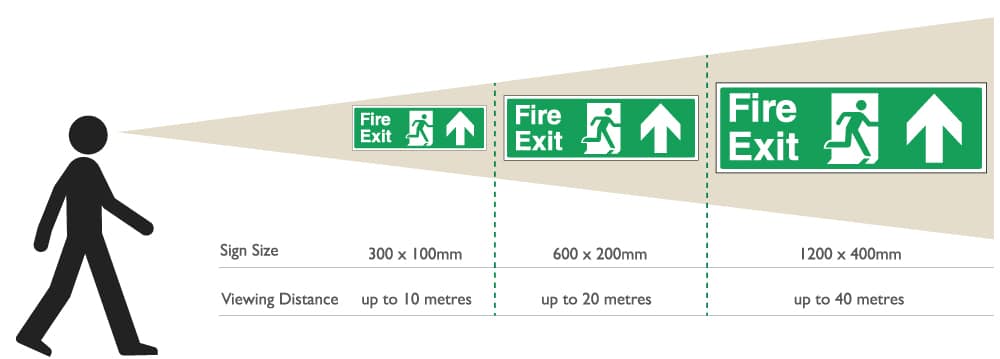
Your fire exit signage is part of the safe condition category, these signs are identified by white text on a green background and gives information on escape routes or first aid. For more information about which direction you require and viewing distances check out our easy to follow blog on understanding fire signage here.

Fire Door Signage

Fire door keep shut

Fire doors are crucial in slowing the spread of fire. When closed, they act as a barrier to help prevent the fire from spreading and when open they allow as a means of escape.

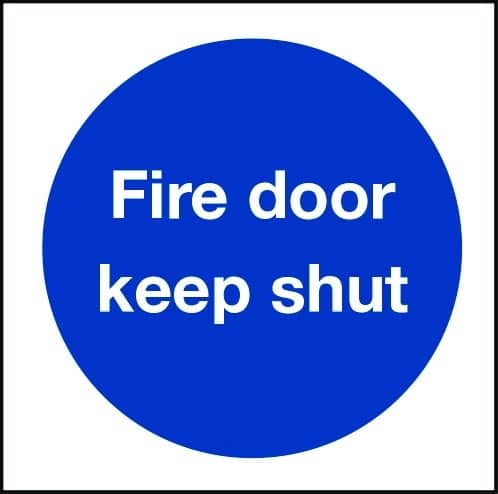
All fire doors should be marked with the appropriate sign dependent on the type of exit. The following signage is mandatory (white text on blue background) which indicates a course of action must be taken. Where appropriate the sign should be displayed on both sides of the door.

  • Fire Door Keep Shut – use for fire doors that need to be closed when not in use
  • Fire Door Keep Locked Shut – use for fire doors that must be kept locked when not in use
  • Automatic Fire Door Keep Clear – use for doors that are held open by an automatic mechanism
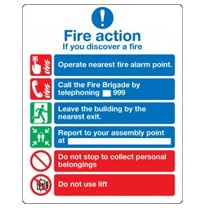
Fire Action Notice

The purpose of a fire action notice is to inform employees or visitors of what action to take in the event of a fire. These signs can come with spaces to fill in details and gives information such as:

Fire Action Notice

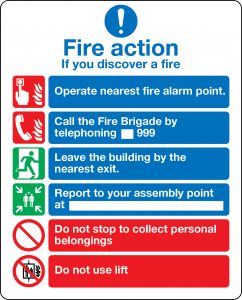
  • Phone number to call the fire brigade
  • Address of building
  • How to exit the building
  • Assembly point information
  • Specific instructions regarding the building

There are a range of different fire action notices – such as notices for buildings with lifts, for residential care homes, for people with mobility issues etc. Ensure you choose the correct sign for your business and the people who use it/have access to. It is a good idea to position your fir action notice next to your fire alarm call point. This means that whoever is activating the alarm has details on what to do and where to go on sounding the alarm.

Fire Assembly point

Fire Assembly Point

Your emergency exit routes need to lead as directly as possible to a safe area. This should be far enough away from the building so that emergency services are able to avoid interference and so potential debris from the fire is avoided.

When determining your fire assembly point you must also ensure this is suitable for vulnerable people when exiting a building such as elderly people or people with mobility issues.

Fire Safety Equipment:

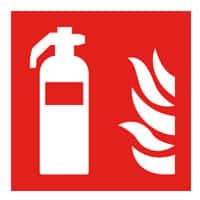
It is crucial that staff and visitors are aware of the location of fire safety equipment and how to use it in the event of a fire. Current legislation states that all fire safety equipment which requires manual handing must be easy to locate and have clear signage. Fire safety equipment signs are red with white text to allow for easy identification

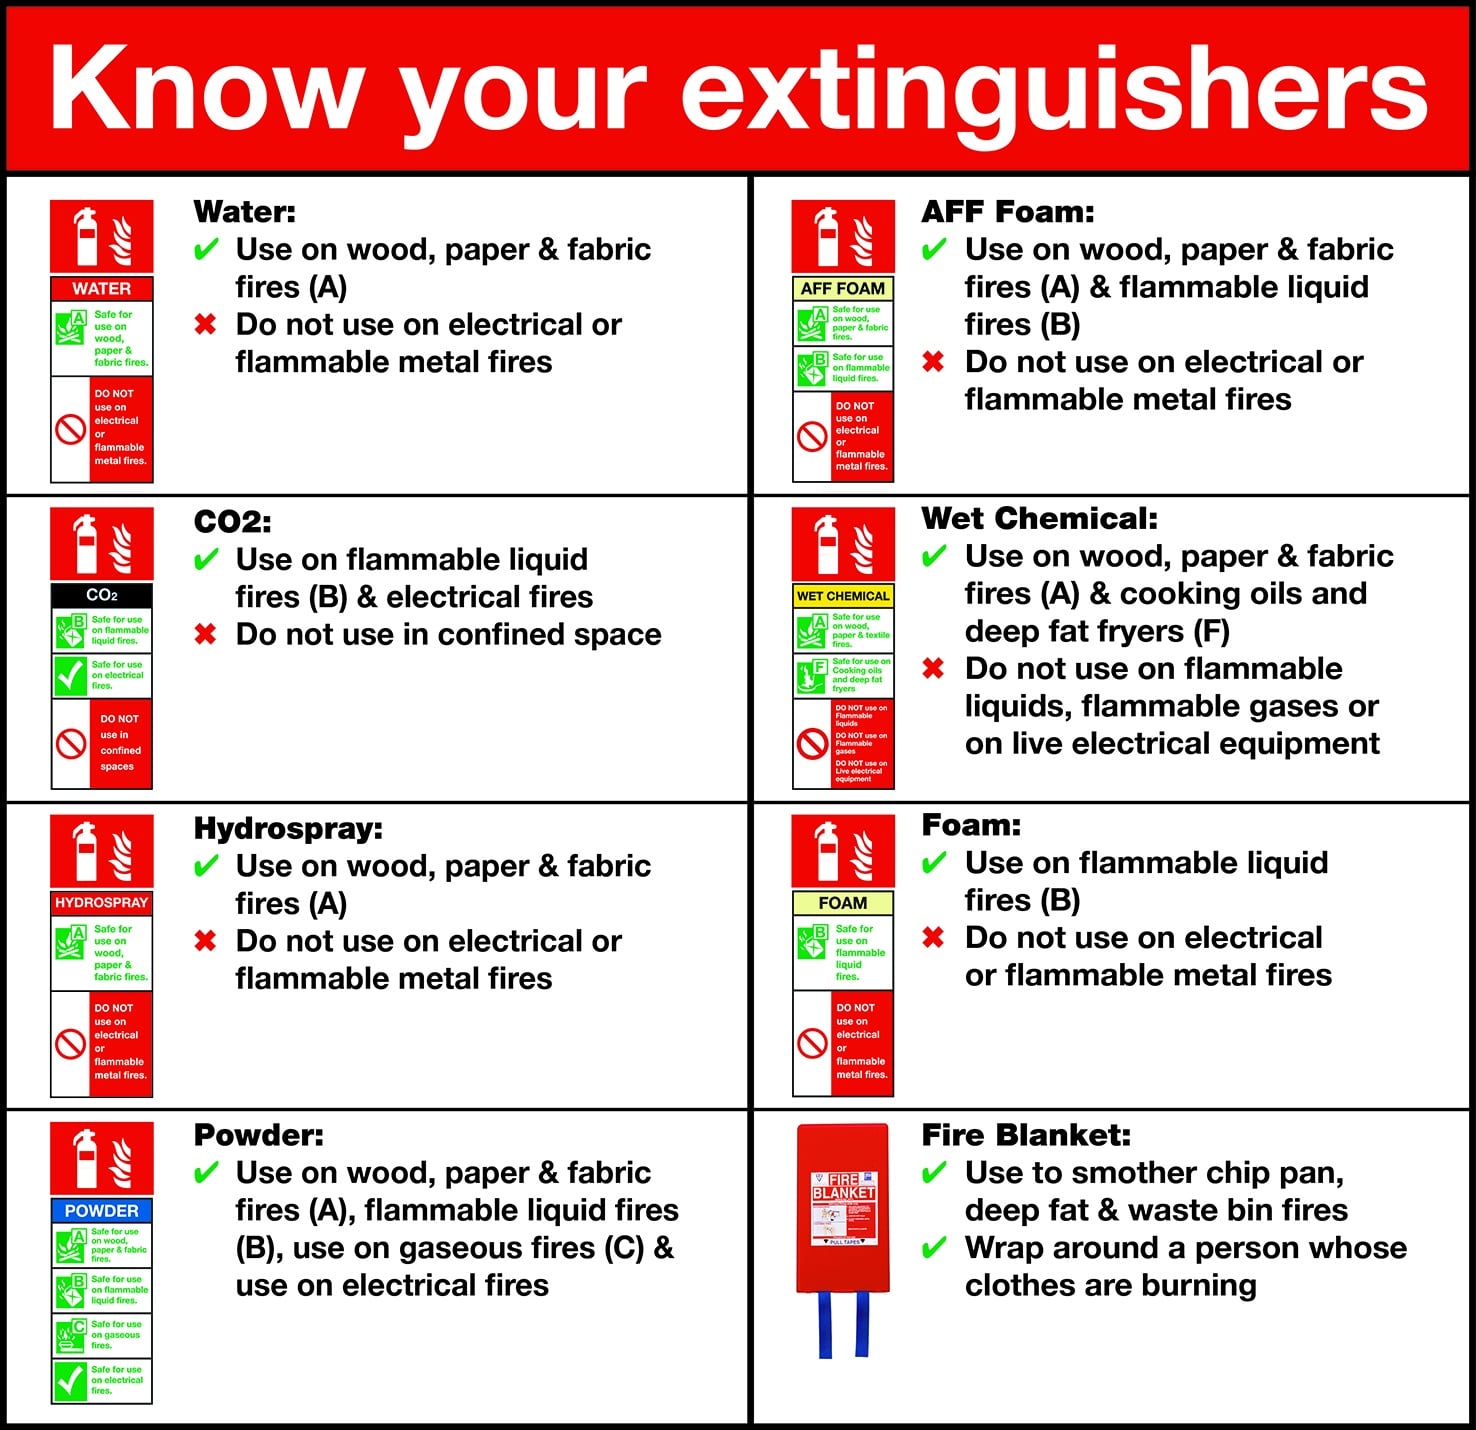
– Fire Extinguishers

It is recommended to display signage giving details on fire extinguishers types (water, Co2, Hydrospray, powder, wet chemical & AFF foam) so that people can quickly choose the chose the correct extinguisher in an emergency depending on the type of fire.

The majority of fires can be successfully tackled in the first few minutes with the correct extinguisher; therefore it is vital that staff are aware of the location and detail of extinguishers. Signage, with symbols to accompany instructions, should be displayed next to every extinguisher location.

Fire Extinguishers

– Fire Alarm Call PointFire alarm call point

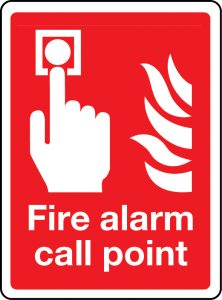
It is mandatory to display a fire alarm call point sign next to all fire alarm points. A fire alarm call point enables people to quickly raise the alarm in the event of an emergency or fire.

UK fire alarm regulations (BS 5839) recommend fire alarm systems to be inspected at least every 6 months and tested weekly to help prevent false alarms and alert occupants in the event of a fire.

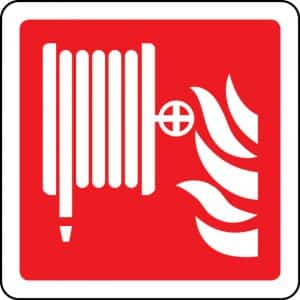
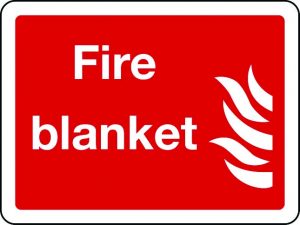
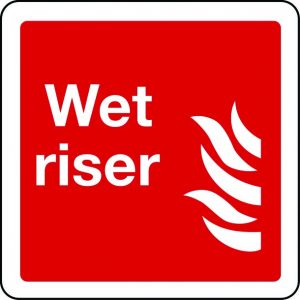
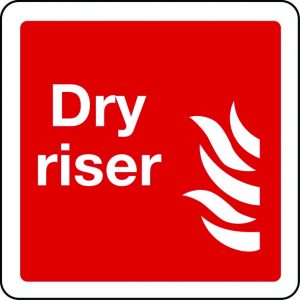
– Other fire safety equipment signage

If you have other fire safety equipment on your premises then you should also include signage to highlight the location. This includes but is not limited to:

Fire hose reel, fire blanket, dry riser & wet riser signs.

Fire hose reelFire Blanket Wet riserDry Riser

Glow with the flow…

All of our Fire safety signs are available in photoluminescent material. The glow admitted from the signs will help staff and visitors make their way out of a building or locate fire safety equipment if the lighting fails. There are multiple benefits of your photoluminescent signage, to read about these read our blog here.

Choosing your fire signage can be a daunting task. What exactly do you need? Where do you have to install them? Will you be compliant with BS EN ISO 7010? What happens if you get it wrong?

In the UK between 2010 and 2014, there were 97,500 fires in commercial premises, with 1,881 fatalities over the same period. It is essential to have clearly marked routes to exits and fire fighting equipment as this will help to limit the risk of loss of life.

Shop our Fire Signage Range now

Where do you place fire exit signs on the escape route?

The first step to determining your escape route is to find your primary escape route. This should be the shortest and quickest route out of the building from any given location. It is also essential to plan a secondary escape route, in the event of a fire makes the primary route impassable.

Determining the signage for your fire escape route is confusing, however, it can be simplified with a few simple guidelines;

  • Within your building, an escape sign should always be visible
  • Once past the first fire escape sign, the next escape sign along the route must be clearly seen
  • Further signage is required at every change of direction along the escape route
  • A fire exit sign must be above all final fire exit doors
  • Ensure there are no conflicting signs along the route e.g. 2 arrow up signs back to back.

Fire Exit signs and where to use them?

Fire exit signs with left and right arrows:

Fire exit signs with left and right arrows are self-explanatory. If you see an arrow pointing to the left, what that is essentially saying is that you should “Progress to the left”. If you see an arrow pointing to the right, it is telling you that you should “Progress to the right”.

Where some of the confusion starts to come in around fire safety signs, is with the up and the down arrow.

Fire exit signs with up arrows:

Fire exit sign with arrow up

Fire Exit Arrow Up is to be used when you have to continue along your route, towards another fire exit sign. It can also be used for final exits. The only exception to this is if there is a step-down or ramp immediately outside.

Fire exist signs with down arrows:

Fire exit sign with arrow down

Fire Exit Arrow Down signs are to be used when you have to continue along your route, towards another fire exit sign. If after an exit sign there is a staircase leading down immediately after your sign, then a down arrow is required.

Are fire exit signs displayed on each fire exit door?

According to the UK Building Regulation requirements, an exit sign should be placed on every doorway, escape window or other routes which provides an exit to a fire.

What size fire exit sign do I need?

One of the most important things to consider when ordering a fire exit sign is the size. The size that you need is based on the maximum distance that the size needs to be viewed from.

Below is a guide to the sizes that you will need based on the distance in meters.

  • Viewing distances for fire exit signs
  • 300mm x 100mm KD – Viewing distance up to 10 meters
  • 450mm x 150mm NF – Viewing distance up to 15 meters
  • 600mm x 200mm RG – Viewing distance up to 20 meters
  • 1200mm x 400mm – Viewing distance up to 40 meters
  • For illuminated signs the viewing distance doubles

When does photoluminescent help with fire signage?

Photoluminescent signs provide additional reliability. In the event of a power failure, they offer a constant source of illumination and invaluable guidance.

Fire safety sign regulations in the UK

All business premises need to have a minimum 2-3 fire safety signs. Training or having common sense is not acceptable for fire safety if an emergency were to occur. For example, if your premises frequently has visitors arrive, then it’s unlikely they’ll be sufficiently prepared if a fire breaks out, which is why visible signage is important for guiding people to safety.

If you’re responsible for commercial premises, you might already know that you need fire safety signs. But it can be tricky to work out which ones you need and where to put them.

There are two main pieces of fire safety legislation for fire safety signs:

The Regulatory Reform (Fire Safety) Order 2005

and

The Health and Safety (Safety Signs and Signals) Regulations 1996

The HSR describes the correct types, applications and maintenance of fire signage, and the RRFSO provides assessment guidance and precautions to deal with any risk.

The HSR states that the number of signs required and their positioning depends on the types of hazards or dangers on the premises.

The RRFSO instructs all businesses with premises to appoint a responsible person who can remain accountable for fire safety. One of the main duties is to undergo regular assessments to examine the business’s fire safety risks and hazards. Once these have been identified, the assessor must take action to ensure that risks are minimised, such as installing fire safety equipment, adding or replacing signage and even making changes to the layout of the premises to ensure it meets safety standards.

So what do you need? There are 4 main applications of fire safety signs in the UK:

    1. A ‘fire Action Notice’ explaining what to do in case of fire
    2. Safety signs marketing fire exit routes, doors, and assembly points
    3. Safety signs showing where fire-fighting equipment is located
    4. Warning and Prohibition signs such as ‘Danger’ or ‘No Smoking

What are the different types of fire safety procedure signs?

Type of sign

Meaning/Purpose

Requirements

Example

Fire Action Sign

A list of instructions to guide anyone inside a building if they discover a fire or need to evacuate the building.

All commercial premises must display a Fire Action Note. It’s recommended that you display this sign next to every fire alarm call point and at every final exit door.

fire-action

Fire Equipment Signs

Information with an extinguisher ID to show people what the fire extinguisher is suitable for. These include: Class A fires: carbonaceous materials, Class B fires: flammable liquids, Class C fires: burning metals, electrical fires, Class F fires: cooking oils and fats.

Premises that keep fire fighting equipment must have adequate fire equipment signs in place near the equipment. There should be a fire extinguisher ID to show people what the fire extinguisher is suitable for.

Fire Exit and Door Signs

These signs guide people on evacuating a building safely and show which safety measures to take.

Non-domestic properties and multi-occupancy residential buildings are required to have fire exit and door signs.

fire-exit

Warning and Prohibition Signs

Warning signs let people know there is a fire risk nearby, prohibition signs display preventative actions to maximise fire safety.

You need a fire warning sign when flammable substances are on the premises, such as gas or oil. Prohibition signs are required when actions could a fire, such as smoking.

Flammable Gas Hazard Sign

Making sure that you have these clearly marked out is key to making sure that your building is as safe as possible for everyone inside.

If you have a large complex project and require any additional information, our expert site survey team are happy to visit your premises to help.

Our sales team can be contacted on 01737 774072 for free advice, or alternatively, you can email.

Every non domestic premise in the UK is governed by safety legislation and as such will have a need for safety signs. Safety signage is a cost effective and efficient way to warn and educate people to the particular risks associated with a building. While there are some signs, such as fire signs, which will be common to all buildings, there are many others which will only be relevant in certain situations. The way to determine the signs needed should be by way of a full risk assessment and perhaps a sign site survey.

Below we have put together our top 10 list of the typical signs likely to be found in businesses and public buildings, but please bear in mind that every building has different requirements and signage should be judged on individual risk assessments.

1. UK Health and Safety Law Poster

For anyone employed, the UK Health and Safety Law Poster must be provided to each worker as a copy of the approved leaflet or equivalent pocket card. The poster must be displayed in a location where it’s visible to workers. On the design of the poster, British health and safety laws are outlined with a list telling workers what employers must do, what employee’s must do and instructions on what to do if there’s a problem.

Health and safety law poster

2. Fire Action Notices 

The Fire Action Notice is to make sure that anyone who is situated in a building has enough information to know what to do if a fire emerges or if they need to evacuate the building. Information that’s typically on these signs include: 

  • The fire services phone number
  • The exit use to leave the building
  • Assembly point locations
  • Further instructions specific to the building 

There are several Fire Action Signs, so it’s necessary to choose the one that is relevant to your premises. If you are responsible for a commercial premises, you must display a Fire Action Notice. It’s best practice to display one next to each Fire Alarm call-point and every final exit door.

Fire action notice

3. Fire Exit and Emergency Escape Signs 

Fire Exit Signs, also known as Fire Escape Signs or an Emergency Exit Sign, direct people in the right direction to exit a building as quickly and safely as possible. These play a key role if a fire was to break out and are a requirement under the Health and Safety (Safety Signs and Signals) Regulations 1996 (HSR) and the Regulatory Reform (Fire Safety Order) 2005 (RFSO).

Fire exit sign with arrow pointing up

4. Fire Equipment Signs 

Fire Equipment Signs contain a description for the type of fire extinguisher that’s available and it’s uses. These can be found in different colours, with the most common being red and green. The sign also details what the fire extinguisher can/cannot be used for. This is provide better safety and reduce inappropriate usage. It’s a legal requirement to make sure all fire equipment is easy to access, easy to use with the right instructions in place.

Foam fire extinguisher sign

5. First Aid Signs 

First Aid Signs are necessary to locate and instruct people where first aid equipment is in a building. They sometimes offer further instructions, such as who the first-aider is and instructions for people with disabilities. It’s a legal requirement that anyone responsible for a premises has enough first aid in place to ensure that people are as safe as possible. These signs and procedures should conform to BS 5499.

Your first aiders are here sign

6. No Smoking Signs 

No Smoking Signs are there to inform people that smoking is not permitted because it may pose a fire risk or potential hazard. These signs are a mandatory instruction, meaning that they should be followed at all times. No smoking signs are located in areas where fire risks are identified, so it’s necessary to install prohibition signs to ensure that safety measures are in place. July 2007 saw a total smoking ban in all enclosed public places, work places and certain vehicles in the UK. The smoke free legislation means it is an offence not to display the appropriate No Smoking Signs, resulting in fines up to £1000.

This is a no smoking area sign

7. Slip, trip & fall signs 

Slip, Trip & Fall signs are a legal requirement anywhere a slippery area is not cordoned off. These signs are to help workers and visitors stay safe and reduce the chances of accidents.  Most premises will have routine cleaning operations which may leave areas vulnerable, which is why these signs are essential to have in place. Lightweight stands holding double-sided signs are readily available.

Danger slippery surface sign

8. Obstacle or Dangerous Location Signs 

Most buildings will have localized hazards, the most common of which are trip hazards and low-hanging obstacles. These signs need to be put in place to advise people to be more cautious when in these areas. Trips are the most common cause of injury, which could be avoIded with a ’Mind The Step’ sign.

Mind the step sign

9. Hazardous Substance Signs 

Many workplaces involve some form of contact with hazardous substances, such as painting, hair and beauty salons and medical professions. The types of risks for each industry varies, but it’s important to understand every hazard symbol and the dangerous related to the substances. There are nine hazard symbols commonly used, which are explosiveflammableoxidisingcorrosiveacute toxicity, hazardous to the environmenthealth hazard, serious health hazard and gas under pressure. So if you’re responsible for a workplace that deals with substances, it’s a legal requirement that you complete regular risk assessments and ensure that the correct signage is in place.

Corrosive substance sign

10. Catering Signs 

Most premises have kitchen or catering facilities. So it’s important to have the appropriate signage in place to minimise risks for burns and also hygiene and food safety. If your workplace prepares and serves food, you need to ensure compliance with The Food Standards Agency (FSA) by having the appropriate signage in place. So whether you have a small kitchen for your staff, or a large, well equipped kitchen for your restaurant, we have your signage covered.

First aid for burns poster

One of the most common mistakes we see with the positioning of fire exit signs is the sign above a doorway. The sign that should be used in most instances should be the arrow up, indicating progress forward from here (indicating direction of travel), and in the case of above a door means, progress forward and through from here.

However we commonly see the incorrect fire exit sign with down arrow. While this wrong sign is unlikely to cause too much confusion as to which way someone should go it is technically incorrect. The down arrow fire exit sign means progress down from here, and technically would only be positioned above a door if there was a change of level downwards immediately after the door way.

We do however appreciate that it can be quite confusing, find out more about where to position your fire exit signs here or call us for more advice on 01737 77 40 72

Fire Exit Signs form one of the most important parts of your emergency escape plan, they are used to correctly mark the most efficient escape routes. Careful positioning of the relevant fire exit signs, will assist evacuation in times of emergency. Every building will have it’s own unique layout and seeking advice from experts is always advantages when planning your escape routes. However there are certain common building layouts, that occur time and again and knowing which fire exit signs to place where can save lives.

In this post we cover some of the most common examples

Where should fire door signs be fitted on a door?

Fire door signs should be fitted on doors that are relatively close to eye level, so make sure that they’re as visible as possible. Most signs are fitted at around 1.5m in height, which is most visible for most people.

What height should fire exit signs be?

Fire Exit Signs inshould installed at a suitable height and in a position appropriate to the line of sight, taking account of any obstacles and in a visible location. When mounting the signs, the general requirements are: 

  • Signs mounted above doors should be between 2.0m – 2.5m above the floor.
  • Signs mounted on walls should be mounted between 1.7m and 2.0m above the floor

Do fire doors need signs on both sides?

It’s a requirement for fire doors to feature a ‘’Fire Door Keep Shut’’ sign on both sides of a single door. If using double doors, both doors require signs on both sides.

Fire Exit Signs On Stairs

Option 1: progress down to the right as viewed from in front of the sign. Sign sited on wall of half landing.

Option 2: progress down from here as viewed from in front of the sign. Sign can be suspended from the ceiling or could be mounted on the wall above the stair head.

Fire Exit Signs in Corridors and Building final Exits

Option 1: progress forward and through from here as viewed from in front of the sign positioned above door.

Option 2: progress to the left/right from here. Suspended at change of direction.

Option 3: progress forward and through from here as viewed from in front of the sign. Positioned above the door. Note: Outside the final exit (labelled 3) if the door can be obstructed a ‘Fire Exit Keep Clear‘ sign is needed on the outside of the door. This could be enhanced with the use of bollards or yellow hatching. If the door is the last door before exiting the building you may have a sign that reads ‘fire exit’ without the need for an arrow.

Fire Exit Signs Above doors

Option 1: progress forward and through from here as viewed from in front of the sign. Positioned above the door.

A common mistake here is to have a fire exit sign with the arrow pointing down, which means progress down from here, and technically would only be positioned above a door if there was a change of level downwards immediately after the door way.

Option 2: progress down to the left from here as viewed from in front of the sign. Positioned on the landing.

If you are still unsure of of where to position your fire exit signs please give us a call on 01737 77 40 72 to speak to one of our advisors or to arrange a site survey.

Fire action notices can contain several texts which are in common use but may not be appropriate for all circumstances but there are certain messages that should be included. There are four significant areas that need to be addressed.

1.       Raising the Alarm.

This should advise of the most appropriate method of action whether this be by operating the nearest fire alarm call point, calling 999, verbally or by any other alarm procedure used in there evacuation procedure.

2.      Fire Brigade.

The fire brigade is often called automatically through the alarm system, however it may be necessary to call the fire brigade manually. Your Fire Action notice may also give additional information which you would be required to pass on to the operator, such as telephone number and exact location details.

3.       Assembly Point

A blank space is provided for details of the nearest assembly point. An assembly point is usually a static safe area marked with the appropriate signage. For premises that have no clear area to use as a regular assembly point mobile extendable fire assembly point signs can be used to guide occupants to the designated safe area.

4.       Additional Instruction

It is customary to include further instructions such as “do not stop to collect personal belongings” or “ do not return to the building for any reason until authorised to do so”.

More specific information can be included for example there can be precise instructions in buildings which have lifts, or for houses that have multiple occupancy.

Where should you display your fire action notices?

Best practice suggests fire action notices should be displayed next to every fire alarm call point and next to the final fire exits. This gives the relevant information at a glance to the person raising the alarm and any further action that maybe required.

There are two distinct styles of fire action notice, one the traditional blue and red sign with written instructions and the other incorporating graphic symbols in line with BS EN ISO 7010. Both of which meet current legislation however the graphic symbol version is growing in popularity due to the effectiveness of relaying information quickly through symbols which would be critical in an evacuation situation.

Please read our post “Where to Position Fire Signs” for more information and advice on where to display fire safety signs for maximum visibility.

While safety signs may not have been at the top of your Christmas list, this time of year is the perfect time to carry out a signage audit of your premises. The beginning of year is always associated with fresh starts, out with the old and in with the new. We often get renewed energy which gives us the impetus to start new projects or clear the decks in anticipation of what January will bring.

Taking Stock of your Safety Signs

Take time to walk round your premises, it may take a couple of trips round if you have a large or complicated building layout. Note all your existing fire signs and safety signs. Do you have all the necessary signs covered by legislation? Through the course of the year things happen to your building, were signs replaced after that wall got repainted? were your signs covered up when you had the last office move round? Many people find that their fire signage is often in the wrong place, check your emergency escape signage is being displayed properly. If you are not sure whether you are completely covered legally get a site survey done to give you peace of mind. While it isn’t yet a requirement to change all your existing safety signs to the new ISO7010 versions make sure any missing or damaged signs are replaced with the new updated symbols.

Care of your safety Signs

Safety signs over time can become dirty or damaged several environmental factors can effect your signs. Signs in areas of high traffic can become dirty quickly. Make sure all signs are clean and clear and be easily read, cleaning where needed. If they are illegible and beyond cleaning replace where necessary.

Signage Clutter

Have you got too many safety signs? are the messages you are giving out confusing? If it is a high hazard area consider replacing a number of your signs with single multi message signs. Having your safety information in one place will not only look smarter but will help reduce sign blindness- where people are so used to seeing the same signs day in day out they in fact cease to register seeing the signs at all.

For more information about safety signs or any other signage query please contact our sales team sales@stocksigns.co.uk  and don’t forget to order your new 2013 catalogue.

This article was first published in December 2011.

What size signs should I use? – Viewing Distances For Signs

We are often asked by customers what size sign they should be using, particularly with regard to safety signs. The truth is there is no hard and fast rule for size of sign and viewing distances. Currently there is no legislation covering this aspect of safety signs and symbols, and common sense has to be used to make a judgement. The viewing distance for signs is dependant on many factors.

  • Ambient Light Conditions
  • Obstructions
  • Height of the sign
  • The colours of the sign design
  • The style and size of the fonts used

However to help in choosing the right signs and make more of an informed decision, the following illustrations will serve as a guide. If you would still like some assistance call our sales team on 01737 77 40 72, or alternatively a site survey of your premises by one of our team, can give you peace of mind, ensuring you have the right signs for your building.

While safety signs may not have been at the top of your Christmas list, this time of year is the perfect time to carry out a signage audit of your premises. The beginning of year is always associated with fresh starts, out with the old and in with the new. We often get renewed energy which gives us the impetus to start new projects or clear the decks in anticipation of what January will bring.

Taking Stock of your Safety Signs

Take time to walk round your premises, it may take a couple of trips round if you have a large or complicated building layout. Note all your existing fire safety signs. Do you have all the necessary signs covered by legislation? Through the course of the year things happen to your building, were signs replaced after that wall got repainted? were your signs covered up when you had the last office move round? Many people find that their fire signage is often in the wrong place, check your emergency escape signage is being displayed properly. If you are not sure whether you are completely covered legally get a site survey done to give you peace of mind. While it isn’t yet a requirement to change all your existing safety signs to the new ISO7010 versions make sure any missing or damaged signs are replaced with the new updated symbols.

Care of your safety Signs

Safety signs over time can become dirty or damaged several environmental factors can effect your signs. Signs in areas of high traffic can become dirty quickly. Make sure all signs are clean and clear and be easily read, cleaning where needed. If they are illegible and beyond cleaning replace where necessary.

Signage Clutter

Have you got too many safety signs? are the messages you are giving out confusing? If it is a high hazard area consider replacing a number of your signs with single multi message signs. Having your safety information in one place will not only look smarter but will help reduce sign blindness- where people are so used to seeing the same signs day in day out they in fact cease to register seeing the signs at all.

For more information about safety signs or any other signage query please contact our sales team sales@stocksigns.co.uk.

We are often asked by our customers which fire exit sign they should use where and with which arrow? This simple guide will help you to select the right signs for your premises and keeping within current legislation. The directional arrows are designed to give visual instructions of the safest route to take in the event of an emergency.

A site survey of your premises can help you ensure your emergency escape plans have the correct signage and can form part of your safety risk assessment.

Below shows the directional arrows and their meanings on Emergency Exit Signs

 Fire exit sign - arrow down Progress down from here    
 Fire exit sign - arrow up Progress forward from here or progress forward and through here. The most commonly used emergency escape sign often seen above doorways.    
 Fire exit sign - arrow right Progress to the right from here    
 Fire exit sign - arrow left Progress to the left from here    
 Fire exit sign - down right Progress down and right from here    
 Fire exit sign - down left Progress down and left from here    
 Fire exit sign - up right Progress up and right from here    
 Fire exit sign - up left Progress up and left from here    

Just because there is statutory requirement for all non-domestic premises to have the right fire safety signage, there is no reason that fire exit signs cannot be used imaginatively to fit in with your building design and decoration.

Here are some examples of the different ways that a compliant fire sign can be used.

1. Wall and ceiling mounted signs are very useful when for example, space is at a premium or there is a low ceiling.

2. Sign frames can add impact to the sign message. One option is to fit the sign into the appropriate sign frame, which can be suspended or wall mounted. Alternatively, for a more design conscious solution a Vision MX frame system, which can of course be double sided.

3. Wall mounted projecting signs increase visibility from several directions.

4. Sometimes conditions require the use of an extra large sign, particularly in public places. Extended view of up to 40 metres can be achieved with signs 1200 x 400mm in size.

5. Again, constraints of design or purpose may require the use of “portrait” style fire signs, for example multi-storey car parks.

6. An innovative aid is the use of fire exit floor graphics as part of a wider safety sign installation.

7. Two larger luminaires are available, for when this type of signage is required or chosen. The cylinder range comes in various options for mounting and is an elegant solution. At a very practical level are the BSI certified metal exit signs which are extremely good value for money.

8. Photoluminescent signs are both effective and alternative choices, and can be used with several of the options available to the standard fire signs.

9. Signs for the physically impaired are part of the provision that can be required under the Disability Discrimination Act. They also show an employers awareness and sensitivity to the needs of this often overlooked section of the community.

10. “Tactual” signs are particularly relevant to the visually impaired, with the wide spaced raised text incorporating Braille. Braille signs fully conforming to BS5499-2:2002 and ISO 7010, as well as Technical Bulletin 24 of the joint Mobility Unit, part of the RNIB.

11. The Hospital Sector has developed a range of fire escape signs, specifically for the sector but have proved popular in other fields too.

12. Finally there is a range of “Standard Enhanced” signs with clear acrylic and satin chrome panel supports – a very aesthetically pleasing choice, which complements the design aware decor of an office, shop etc. All in all, a much larger selection of fire and emergency escape signs than perhaps one might have imagined. The good news is that Stocksigns can supply all the ranges listed above. Why not think seriously about how you enhance your signage.

In situations of emergency evacuation, especially when confronted by power failure, a way guidance system using photoluminescent signs and markers will help to indicate clearly defined escape routes, saving critical time for the evacuation of the building.

BS 5266-6: 1999, is a Code of Practice for non-electrical low-mounted way guidance marking using a photoluminescent system. It recommends how to plan, design, install and maintain the system when used in conjunction with powered emergency lighting. The use of this standard, combines with BS ISO 16069:2004, Graphical symbols – Safety signs – Safety way guidance systems and BS 5499-4: 2000, Code of Practice for escape route signs, gives the answers to most questions that could be asked from those contemplating installing a photoluminescent way guidance system.

The installation of a photolumiescent way guidance system does not replace the use of powered emergency lighting when this is required, but compliments its existence. For a satisfactory performance, photoluminescent materials require initial activation from a good light source.

Under BS EN 3 operative from the 1st January 1997, all new certified fire extinguishers used in European Union countries must feature red bodies. In line with familiar UK practice, BS 7863 allows manufacturers to affix coloured identification panels on or above the operating instructions covering no more than 5% of the body surface area and visible through a horizontal arc of 180 degrees when the extinguisher is mounted.

The new harmonised European standard on fire extinguishers – BS EN3 –  which came into effect in 1st January 1997, provides a single standard for fire extinguishers across Europe. It replaced the old British Standard BS 5423, which has now been withdrawn.

BS EN3 is the standard now used for the specification, manufacturing and purchase of extinguishers in the UK. An additional standard BS 7863 details the revised colour coding system and supplements BS EN3.

BS EN3 is not retrospective and pre-existing extinguishers do not need to be replaced with extinguishers to this new standard. However, any replacements as a result of damage, wear or un-serviceability or new extinguishers will need to meet this new, later standard. While BSEN3 has now been in place for a number of years, understanding the colours and codes should be part of your regular health and safety training and form part of your new staff induction programme. There are a number of resources such as Fire Extinguisher Colour Guide Code Charts that can serve as staff information points and training aids. Fire Extinguisher location panels can aid your routine premises maintenance. As well as providing information on the use of the particular fire extinguisher mounted they also give a visual warning as to when the extinguisher has been used and not replaced.

The New Standard Fire Extinguisher Standard
The main differences between the old and new standards are:

  • A minimum of 95% of the extinguisher body must be red
  • Zones of colour, indicating the contents of the extinguisher, are permitted
  • The markings on the extinguisher must follow a specified layout
  • Pictograms are used indicating the type of fires that the extinguisher is suitable for
  • A minimum body shell thickness is specified
  • Minimum fire performance ratings for the size of the extinguisher are specified
  • Operating temperatures of some extinguishers are increased
  • Some discharge times are increased

Although there are many technical changes and the improvements in the new standard, the most noticeable change is to the colour of the extinguisher bodies.

Fire Extinguisher Colours and Codes

Understanding the colours and codes should be part of your regular health and safety training and form part of your new staff induction programme. In the UK we were used to a system of using the colour of the body of the extinguisher to indicate its contents. However, this system has been peculiarly British with all extinguishers in Europe being coloured completely red.

Since extinguisher colour is no longer used to identify the type of the extinguisher, it falls to the standard pictograms to illustrate the types of fire that extinguisher can be used on. The pictograms are: Fire Extinguisher Types Pictogram

Class A fires involving organic solids; e.g. wood, paper
Class B fires involving flammable liquids
Class C fires involving flammable gases
Class F fires involving cooking oil and fat

A concession was made in this latest standard for a small zone of colour to be available on the body of the extinguisher to further help identify the contents of the extinguisher. A colour zone of up to 5% of the surface area of the extinguisher can be positioned on the top half of the front of the extinguisher body and be visible from 180 degrees. The British Standard BS 7863 outlines the colours that can be used in this way and follows the colour coding that has been used for many years. In addition, there is now a new colour for the Wet Chemical extinguisher (see guide above). The colour codes are:

Red – Water
Cream – Foam
Blue – Powder
Black – Carbon Dioxide
Canary Yellow – Wet Chemical

A further effect of the latest standard is that customised colours (most commonly chromed stainless steel) are no longer allowed; although, as there is no immediate need to change these extinguishers, they (and particularly the stainless extinguishers) may well be in use for some considerable time.

Replacement of Extinguishers
Even though pre-existing extinguishers do not need to be replaced, the gradual appearance of the new, latest standard extinguishers alongside older types may cause some confusion. The continued presence of other coloured extinguishers in an area may suggest to some users that the red extinguishers will contain water but this might not be the case, with potentially serious consequences.

Everyone should now what to do in the event of a fire and this includes being able to select the appropriate type of extinguisher to use. To reduce the chances of confusion, mixing new and old standard extinguishers in the same area or building should be avoided.

Note also that the British Standard on servicing BS5306: Part 4 states that all extinguishers installed in any one building or single occupancy should have the same method of operation and, if intended for the same function, should all be similar in shape, appearance and colour.

Summary for Fire Extinguisher Identification

  • Ensure that all new extinguishers obtained comply with BS EN3
  • Ensure that everyone is able to identify the different types of fire extinguisher and their respective use through training and guides
  • Provide information on the colour standards for fire extinguishers
  • Clearly sign extinguishers and their use with fire safety equipment signs
  • Do not mix extinguishers conforming to the old and new standards
  • Do not mix extinguishers which have different operating methods

Stocksigns has the largest range of fire safety signs on the market for more information on these and our other safety signs why not order our safety signs catalogue or call our Sales Team on 01737 77 40 72.

Emergency lighting is designed to illuminate automatically the emergency escape route (i.e. staircases, landings, passageways etc.) upon failure of the supply to the normal artificial lighting. The emergency lighting must comply with BS 5266: 2005. It is vital that emergency lighting comes on if the normal lighting fails. It needs to be sufficiently bright, illuminated for enough time, and the light sources so positioned that the staff and visitors of a building can be evacuated safely in an emergency

Siting of Luminaires

Luminaires should be sited in the following positions:

  • At each exit door
  • At each intersection of corridors
  • At each change of direction
  • Close to each staircase
  • Close to any change in floor level
  • Close to fire equipment and alarm call point locations
  • At locations that adequately illuminate emergency escape and safety signs

Maintained & Non-maintained Systems.

Non-maintained systems are used in buildings with a limited occupation time, such as offices and shops, and only operate when the power fails. In general, Maintained systems are required for places of entertainment and licensed premises and can be on all the time from normal mains supply, remaining on when the power fails.

For more information contact our sales team on Tel 01737 77 40 72 or sales@stocksigns.co.uk

Over the next few months we will see the adoption of a new standard for safety signs as ISO 7010 is soon to become Pr EN 7010. The change will see safety signs in the workplace move away from being an “International standard” (essentially a recommendation on best practice), to a European norm (meaning the contents of the standard must be written into UK and EU law). ISO 7010 has been developed to provide consistency in design across the EU. We will be phasing in the new designs throughout 2011 and you may notice some design changes to the symbols whereas others will look virtually unchanged. Whilst the new symbols will be replacing the old designs, both designs will still meet your safety obligations.

ISO 7010 – An Overview.

In the late seventies, as the European Community was coming into being, it was recognised that with a large migratory workforce within the EU countries, there would be a real problem communicating health and safety issues.

It was decided to create an international standard based on pictograms. This lead to the publishing, in 1984, of the first health and safety standard; ISO 3864-Safety Colours and Safety Signs, which is still current today and is the basis for both ISO 7010 and BS 5499.

Because ISO 3864 was not grounded in law, it did not become established across the EU. So, in 1992, a European Directive based on ISO 3864 was passed, which made it a legal requirement for member states to write the requirements into their countries health and safety legislation, this was EC Directive 92/58/EEC.
In the UK this took the form of the “Health & Safety (Signs and Signals) Regulations 1996.

The Directive was a bit vague regarding the symbols to be used and soon a variety of different symbols had developed across Europe, the “Euro” fire exit symbol being a good example.

The situation regarding these symbols now needed to be rectified.

Here in Britain, this lead to the revision of the previous standard and in 2002, BS5499:2002 Graphical Symbols and Signs, was issued.

The need for correct pictograms across Europe was now evident and so the International Standards Organisation were compelled to update their own standards and so, using BS 5499 as a basis, they split ISO 3864 into two parts:

ISO 3864:2002 – covering shape and colours, as before.
ISO 7010:2003 – covering pictograms.

As previously seen in the Eighties, for these changes to have any impact, it would be necessary to write this standard into law, which is the process we are in the middle of now.

Making ISO 7010 into an EN, means that the status of the standard will change from being a recommendation of best practice, to a European Norm, requiring that the contents of the Standard are written, without change, into all EU countries laws.

This means that there will be a legal requirement for the same sign to be used in every country for the same requirement.
It will mean that a fire exit sign in England will be the same as it would be in France, Spain, Germany or anywhere at all within the EU.

ISO 7010 – A Brief History – milestone timeline

Late seventies – large migratory workforce in the EEC
1978 – BS 5499 – Fire Safety Signs, Notices and Graphic Symbols
1992 – EC Directive 92/58/EEC
1996 – “The Health & Safety (Signs and Signals) Regulations
2002 – BS 5499:2002 – Graphical Symbols and Signs
2003 – ISO 3864:2002 and ISO 7010:2003

our new 2011 catalogue is has been completely updated to include the NEW ISO 7010 safety symbols

Safety signs and symbols are important safety communicating tools, they help to indicate various hazards that present in plant site or workplace. At the same time, they warn workers to always keep watching out for those hazards by giving required information and safety instructions.

Safety signs and symbols do not only inform the presence of hazards, but also help create workers’ safety awareness. It is very important in reducing accidents in the workplace more obviously in maufacturing, heavy industry and on construction sites but also important in office based environments too.

To get the most out of health and safety signs and symbols, you should choose the right ones for each work location on your premises. Each work area needs different workplace health and safety signs and symbols. This is because each work area has different types of hazards. A risk assesment of each activity or designated area will help identify hazards. Appropriate actions for ensuring safety can then be drawn up and selecting the appropriate safety signs can then be selected. Where possible safety signs shown be changed (at least their location) to keep the safety message fresh and to avoid “sign blindness”.

Safety Signs and Symbols Standards

Safety signs and symbols consist of messages, words and pictorial symbol with variety of sizes, shapes and colours. All the shapes and colours are standardised. Each shape has different meaning and each colour reflects specific meaning.

Using standardised health and safety signs and symbols will make them understandable and overcome language barriers and the new ISO 7010 standard is the first step towards a global harmonization of safety symbols. More indepth infomation can be found at Safety Signs, Symbols and Colour Codes – a simple guide

Safety Signs – Shapes

The shapes of workplace health and safety signs are triangles, circles and squares or rectangles.

i. Triangles: indicates caution (potential hazards) or warning (definite hazards), for example toxic gas and electric shock.

ii. Circles: mandatory or recommended actions and are normally used to depict an action you must do, for example wearing eye goggles and safety hard hats.

iii. Squares or rectangles: shows information, i.e. general information and emergency information (first aid, fire fighting).

iv. A Circle with a 45° diagonal slash across the middle from the upper left to the lower right: points out forbidden or prohibited actions.

Safety Signs – Colours

The colours used in workplace safety signs and symbols are red, yellow, blue and green.

i. Red signs: designates areas for emergency devices like fire fighting equipment, or to emphasise unsafe or forbidden actions.

ii. Yellow: notifies workers to take caution and be alerted of hazards, reducing necessary risks.

iii. Blue: shows a particular action or behavior, for example instruction to wear personal protective equipment.

iv. Green: designates the location of emergency measures or equipment like first aid kits, evacuation routes, fire exits, escape ladders, or fire assembly points.

Safety Signs – Pocket Guides

Simple pocket guide with at a glance guide to the different colours and symbols used in safety signs make excellent reference material for workplace safety training and can be issued as part of new employee induction training.

The use of symbols and graphical images is a simple safety system used to convey safety messages at a glance. Colours and symbols appropriately used can provide information and warnings of hazards which are essential to safety at work, and in some instances may be independent of language.

The Health and Safety (Safety Signs and Signals) Regulations 1996 require employers to provide and maintain safety signs where there is significant risk to health and safety that has not been avoided or controlled by other means (e.g. safe systems of work) provided that the use of a sign can help reduce the risk. They also require, where necessary, the use of road traffic signs in workplaces to regulate road traffic. Employers must also ensure that all employees receive appropriate information, instruction and training regarding safety signs.  Although most signs are self-explanatory, some employees (particularly young or new workers) may be unfamiliar with the signs used.

What is a safety sign?

A safety and/or health sign is defined as information or instruction about health and safety at work on a signboard, a colour, an illuminated sign or acoustic signal, a verbal communication or hand signal.

A signboard is a combination of shape, colour and symbol or pictogram made visible by adequate lighting and which may have supplementary text.

What are the 4 types of safety signs?

There are four different types of safety signs:

  • Prohibition / Danger Alarm Signs
  • Mandatory Signs
  • Warning Signs
  • And Emergency

Each of these signs has its own colour with different variety of signs.

Safety sign colours

What do Red safety signs mean?

When a sign is Red, it’s usually a prohibitory sign that aims to grab people’s attention for a dangerous situation nearby, such as preventing people from smoking in an area containing flammable materials.

What do Yellow or Amber safety signs mean?

Similarly to traffic lights, yellow or amber signs send a warning to viewers, which is an indication to take precautions in the environment their in. This includes being in an area with dangerous chemicals, high voltage electrical equipment or even to be careful of the step on the street.

What do Blue safety signs mean?

Blue safety signs are mandatory signs which instruct people to undertake an action before proceeding. This could be wearing protective clothing,  keeping a fire door shutt, making sure premises are tidy and applying hand sanitiser.

What do Green safety signs mean?

Green safety signs are informative for the reader to signal safety, directing them to areas such as exit routes, first aid stations and assembly points.

What are combination safety signs?

Under ISO 7010 legislation safety signs can be combined to give multiple messages.

Combination sign

This sign gives a hazard warning (yellow) that the site is dangerous. It gives a prohibition instruction (red) that there must be no unauthorised entry and a mandatory instruction (blue) that a course of action must be taken – visitors report to site office.

These multi message signs are ideal for construction sites or garage forecourts where a combination of messages can be delivered in one place in potentially dangerous environments.

When are barrier tapes used?

Barrier tape can be used where the marking of dangerous locations is deemed necessary (e.g. highlighting the edge of a raised platform or area or restricted heights). They can be used internally or externally to help alert people of a hazard or danger.

We supply a range of different tapes such as reflective hazard warning tapes, self-adhesive photoluminescent tape, graphic barricade tape and pipeline identification tape. Please call a member of a sales team on 01737 774072 to discuss your tape requirements.

black and yellow hazard barrier tape


ISO 7010

Large elements of the British Standard BS5499 symbols have been changed since the introduction of ISO 7010. The basic principles of understanding safety symbols have remained the same i.e. colour and shape of out line symbol but some of the icons/symbols have changed.

For more advice contact our sales team on 01737 774072 or send us an email.

RED

Meaning or Purpose

Prohibition/Danger alarm

Instruction and Information

Dangerous behaviour; stop; shutdown; emergency cut-out devices; evacuate

Features

Round shape; black pictogram on white background; red edging and diagonal line; red part to be at least 35% of the area of the sign

An Example 

1440 Strictly No admittance safety sign

YELLOW

Meaning or Purpose

Warning

Instruction and Information

Be careful; take precautions; examine

Features

Triangular in shape ; black pictogram on yellow background with black edging; yellow part to be at least 50% of the area of the sign

An Example 

2813 - warning overhead cables

BLUE

Meaning or Purpose

Mandatory

Instruction and Information

Specific behaviour or action e.g. wear personal protective equipment

Features

Round shape; white pictogram on blue background; blue part to be at least 50% of the area of the sign

An Example 

mandatory-hard-hat-area

GREEN

Meaning or Purpose

Emergency escape or First Aid

Instruction and Information

Doors; exits; escape routes equipment and facilities Return to normal

Features

Rectangular or square shape; white pictogram on green background; green part to be at least 50% of the area of the sign

An Example 

Fire Exit sign with left arrow

RED (fire fighting signs)

Meaning or Purpose

Fire fighting equipment

Instruction and Information

Identification & location

Features

Rectangular or square shape; white pictogram on red background; red part to be at least 50% of the area of the sign

An Example 

Fire alarm call point landscape layout sign

Stocksigns ideas to help build your green credentials

Many companies are committed to recycling and purchasing non-toxic supplies, but they still work in buildings whose materials, electrical systems and waste systems were in place long before being “eco” became the business buzz word of the moment and before the economic benefits of being green were truly understood. Different companies will have different factors to consider when improving their green credentials. For example a solicitors firm will have different concerns than a construction site. But one way (more…)

Stocksigns has developed a new safety sign incorporating a Gas Horn. Gas horns are ideal fire alarm device’s where a conventional fire alarm system is inappropriate. For example, building sites, concrete plants, quarries, workshops and temporary buildings. They are suitable for internal and external use. The Air horn sign enables you to spot missing safety equipment at a glance. For more information email dharbison@stocksigns.co.uk

Air horn advert